
Dugout Shelter – Clay Fireplace – Walk Wild Bushcraft Basecamp
What was the goal of this trip? In this week’s trip, we wanted to make a start on the Bushcraft Dugout shelter that we marked…
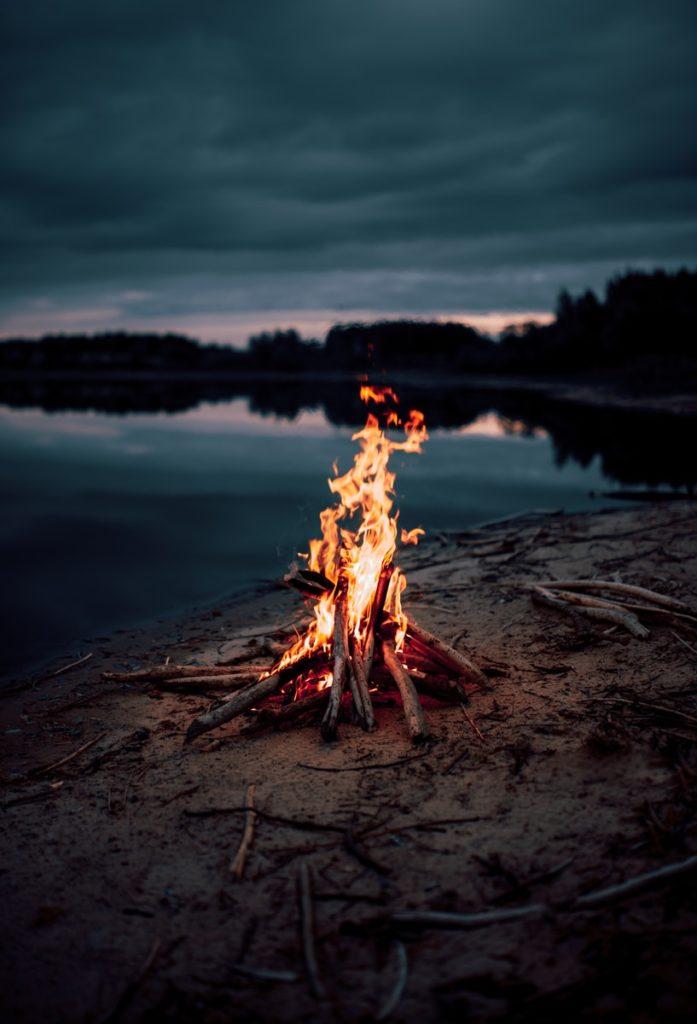
A cornerstone of wilderness living is the skill of making a fire in any conditions. This article covers the essentials you need to know.
One of the best ways to get back to nature is to go out into a forest and build yourself a campsite.
A big part of this is learning how to start fires, whether it’s just for warmth, moral, comfort or for cooking food.
Where a lot of beginners go wrong is not preparing enough before ignition. Here are all the components for a successful fire.
Some of the most commonly available tinder in Canada include birch bark, cattails, bird’s nests, feather sticks, char and amadou.
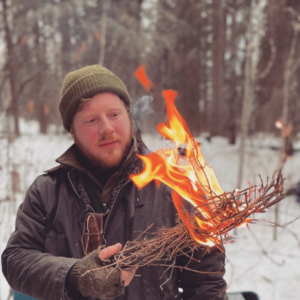
Without stating the obvious of matches or a lighter, our favourite ignition sources include the ferrocerium rod, or fire steel, and the classic flint and steel. If you want to go really primitive or in an emergency situation with no other choice, a friction fire is also a good method to know.
After your tinder has been lit, you will need fuel to make sure it doesn’t go out. This is usually wood that’s been gathered from the surrounding forest and should be gathered and processed down to varying sizes. Here is a guide:
Fire needs oxygen to burn. Make sure that whatever style of fire you build there is plenty of airflow available.
When it comes to tinder, there is a good variety out there depending on your environment.
In Northern Canada, these are the top picks:
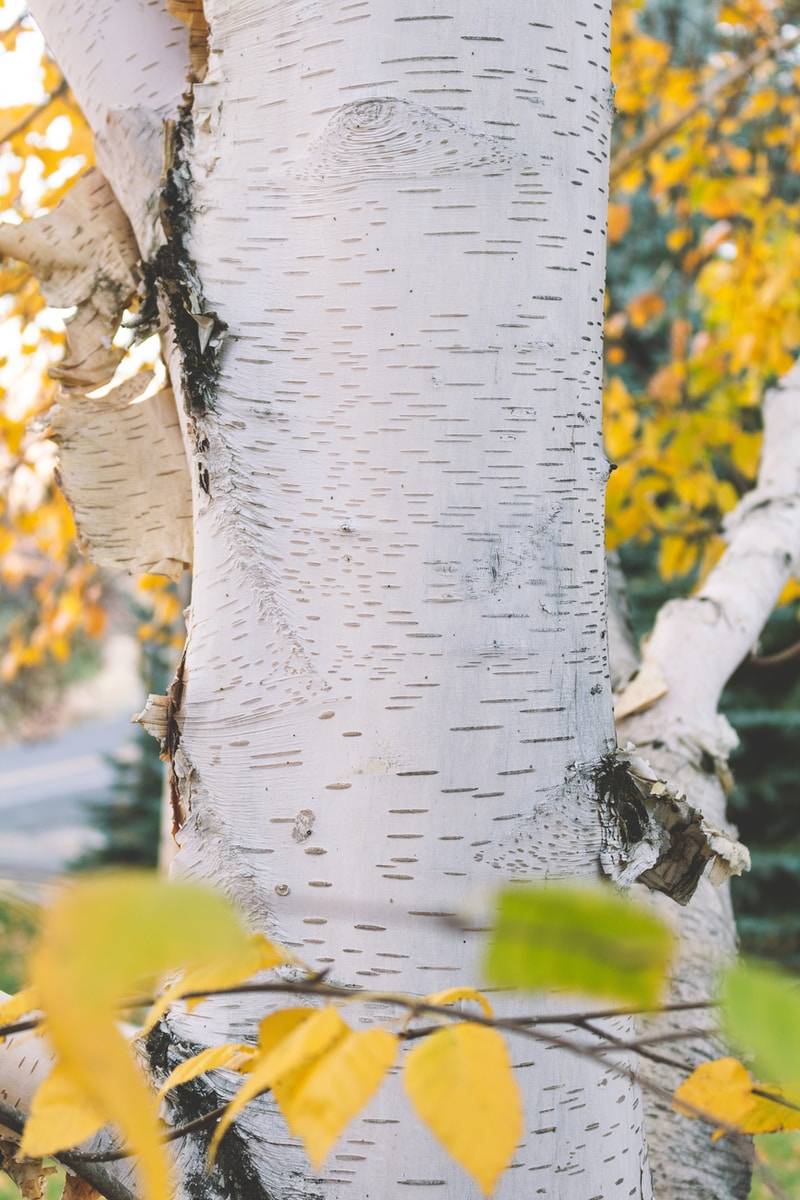
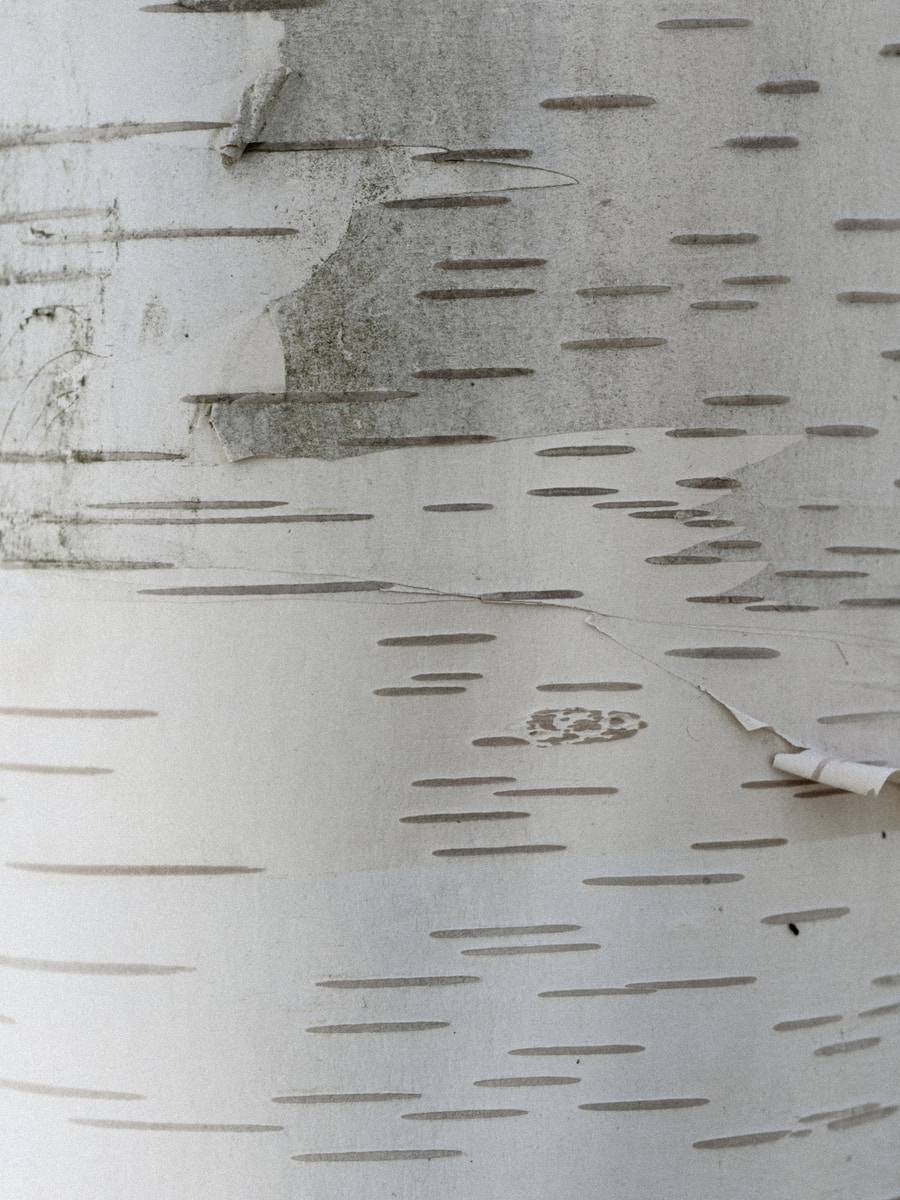
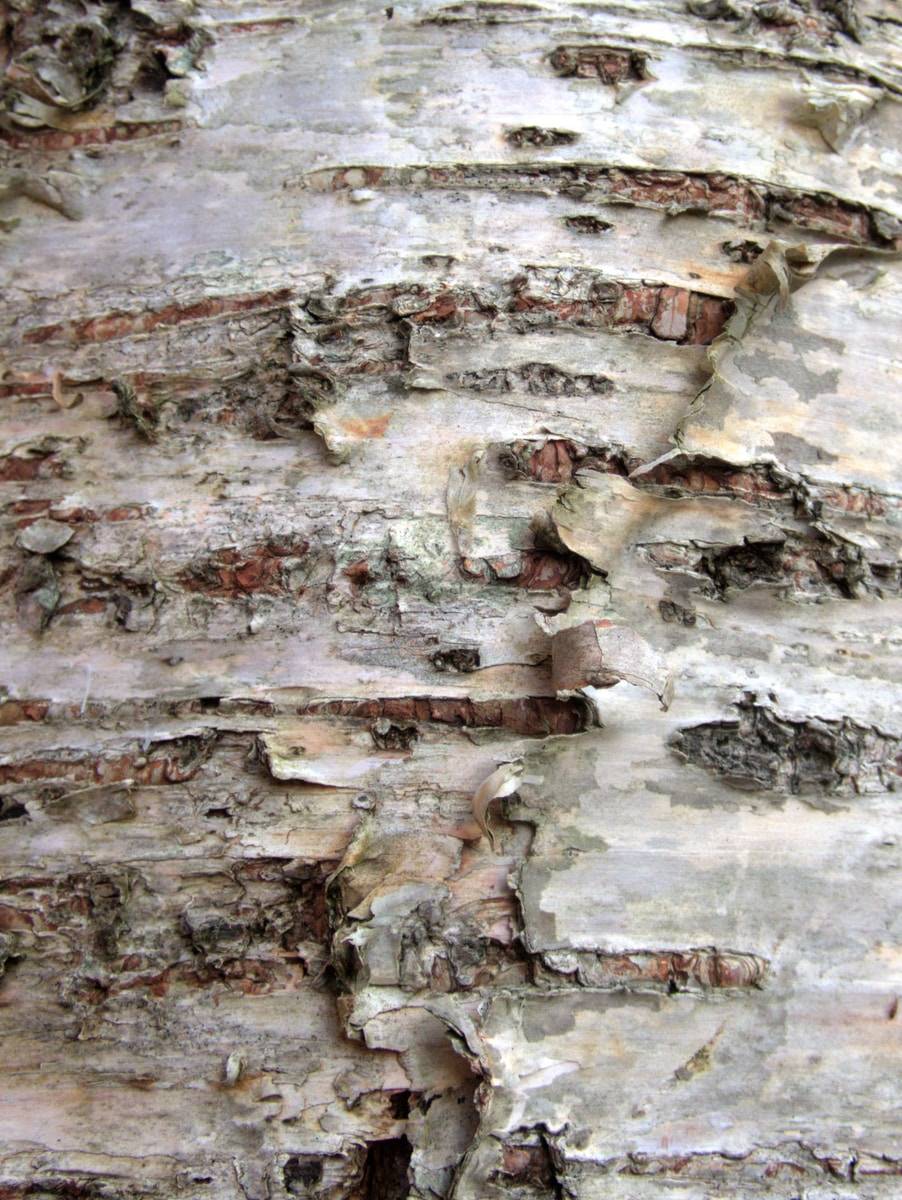
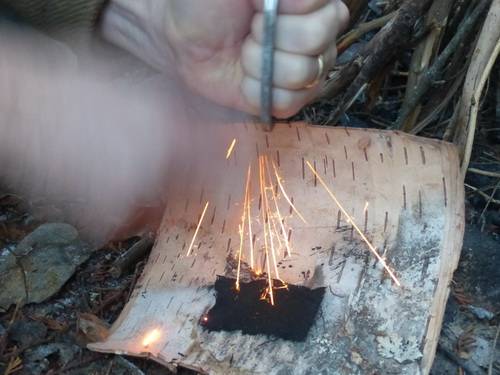
Birch bark comes from birch trees. It is easy to find in dense forests, especially in the northern hemisphere and Canada. While not every birch tree has bark that peels off easily, many do— often as a result of high winds or other weather disturbances. So if you’re out on a hike, keep an eye out for birch trees with bark that’s already beginning to peel off.
Birch bark is the outermost layer of the tree and can be removed without hurting the tree. It is a very useful material because it is incredibly flammable, even when wet. This is why it is such an important part of making a bushcraft fire — if you can find dry birch bark, it will help you get your fire going no matter what else you have on hand.
How to use:
Using the blade of your knife, scrape the birch bark with the grain to create small flakes of bark, once a small pile is collected you can strike a spark directly into the flakes to create a flame.
Advertisement
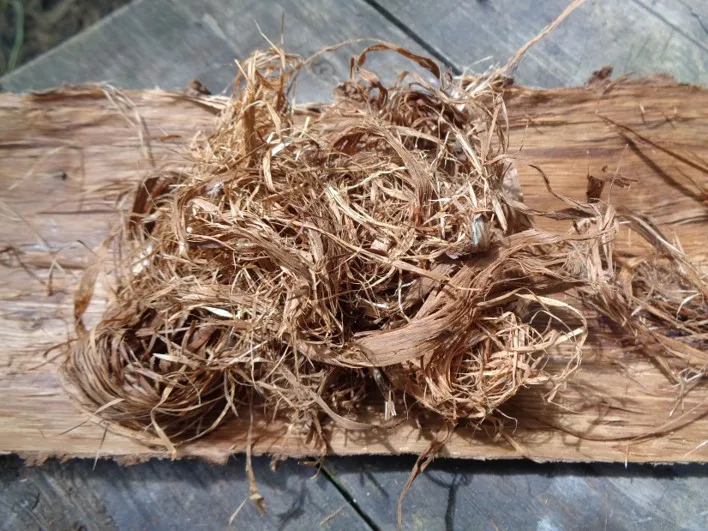
Often referred to as “Bush Gold”, the inner bark of Poplar or Cedar can prove to be one of the best fire tinders if it can be found in your surrounding area.
How to find Bush Gold
If you can identify a dead standing Black Poplar or Red Cedar tree, it is as simple as removing the outer bark and gaining access to the inner bark. Then simply remove the inner bark – it should resemble tightly packed fibres.
How to use Bush Gold
When you have successfully harvested the inner bark, you can break the fibres apart and briskly rub them together to create a dense bird’s nest of material. If it feels a little damp, it can be placed between the layers of your clothing to dry out. These roughed-up fibres are perfect for placing an ember into for starting a fire.
Photo Credit: Jack Raven Bushcraft
Advertisement
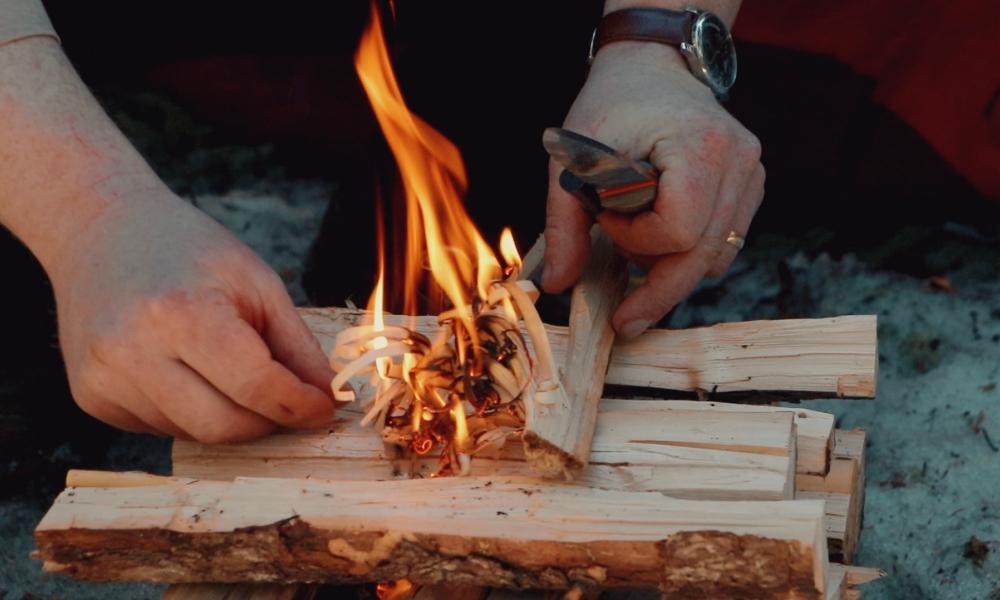
Feather sticks are one of the coolest tricks in the bushcraft fire-starting arsenal. A feather stick is a stick with a bunch of little cuts (or “feathers”) in it, and it creates a ton of surface area to help you get your fire going.
What is a feather stick?
A feather stick is essentially a stick that has been shaved in such a way that the shavings from tiny “feathers” from one end to the other. The wood that is shaved off catches fire easily and also burns for quite some time.
How do I make it?
Making a feather stick is relatively simple, but it does require some skill with a knife. Start by shaving thin layers of wood off the side of the stick until you’ve created thin, even feathers all around the stick. Be careful not to cut into the bark too deep!
How do I use it?
To start your fire, you’ll need some dry tinder and kindling (small twigs and branches). You can gather these from the forest floor or from dead branches on nearby trees. Use your lighter or matches to light one end of your feather stick and place it on top of your kindling and tinder. The feather stick will catch easily, and catching your kindling on fire should be a breeze.
What is Wood Wool?
Wood wool is a term used for fine strands of wood that have been forced into tight curls. It creates a perfect place to send a spark for you to start a fire.
How do I make it?
To begin creating wood wool you need to scrape the spine of your knife against the flat of the piece of wood you are working with. The knife has to have a very square and sharp spine to achieve the best results. Small tight curls of wood should form, resembling a fluffy wool consistency, hence the name.
How do I use it?
When you add a spark, the extremely fluffy dense curls should ignite with ease.
Advertisement
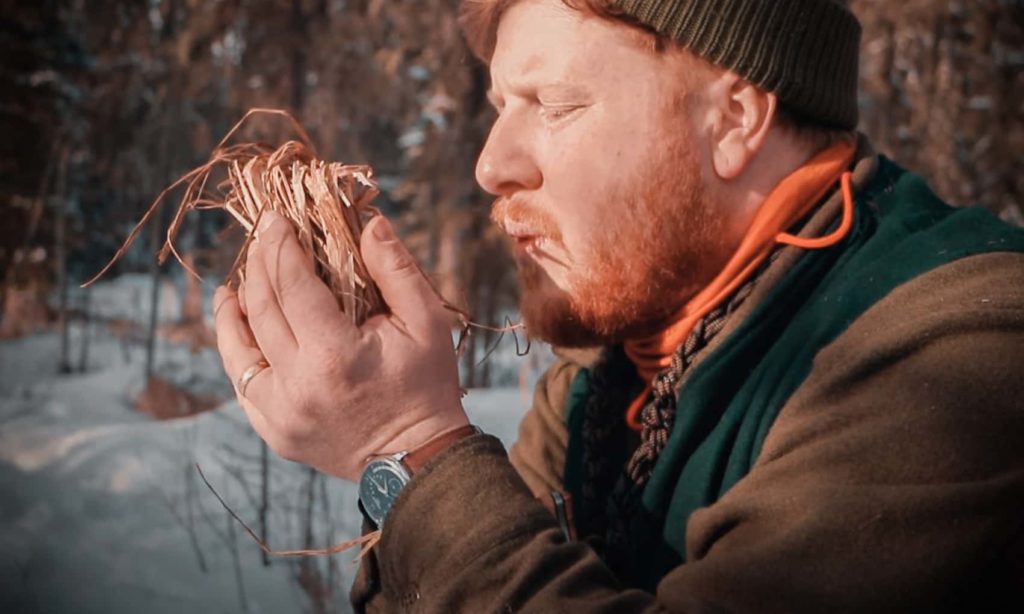
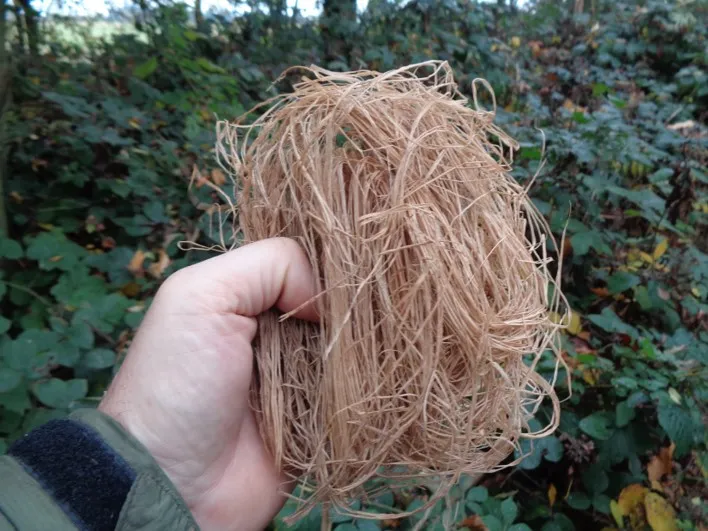
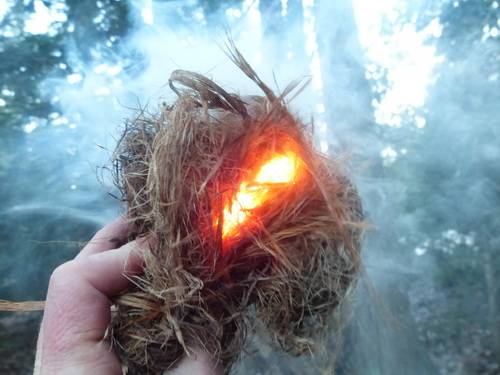
Ah, the birds nest fire.
You’ve probably heard of this one before. It is a traditional method for turning an ember into flame and a great way to get your fire started, but first, you’re going to need some specific materials to build it.
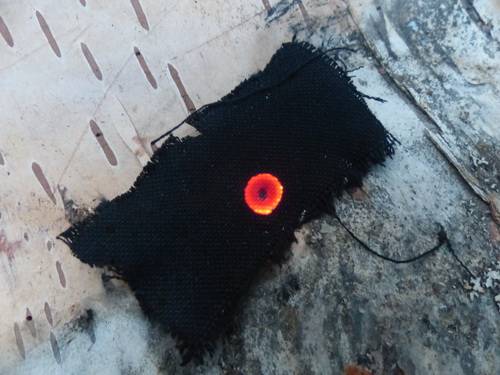
Char cloth
Char cloth is just cotton fabric that has been charred through pyrolysis. The process involves putting the fabric in a small tinder tin (a small container with a lid that has a hole punched in its lid).
The tin is placed in a fire until the fabric inside turns black and is turned to carbon, usually, you will know when the process is complete because there will be no flames being produced from the hole in the tin.
If you’re trying to make your own char cloth, it is important never to open your tinder tin until it has cooled down completely—otherwise, you can introduce oxygen back into the container and lose your char cloth due to it reigniting. It can help to bury the tin in the earth after its removal to help mitigate the risk of this happening.
Amadou
Amadou is a porous material that comes from the sponge-like interior of the horse hoof fungus (Fomes fomentarius) or the false tinder fungus.
It’s used as tinder when fire making, as it makes it easier to light fires even with damp materials. You can use amadou to start fires in all kinds of weather and you can even use it in wet conditions. Preparing amadou for fire-making can be tricky. Here is how to do it:
A prepared birds nest
A bird’s nest is essentially just a ball of fine tinder commonly made from dry grass or the previously mentioned “Bush Gold” with a cavity in the centre so that it resembles a bird’s nest. Adding Cattail fluff and birch bark shavings helps to make the bird’s nest more flammable.
Advertisement
With fire starting, everyone has their own preference on how to ignite their tinder. Here are the top methods.
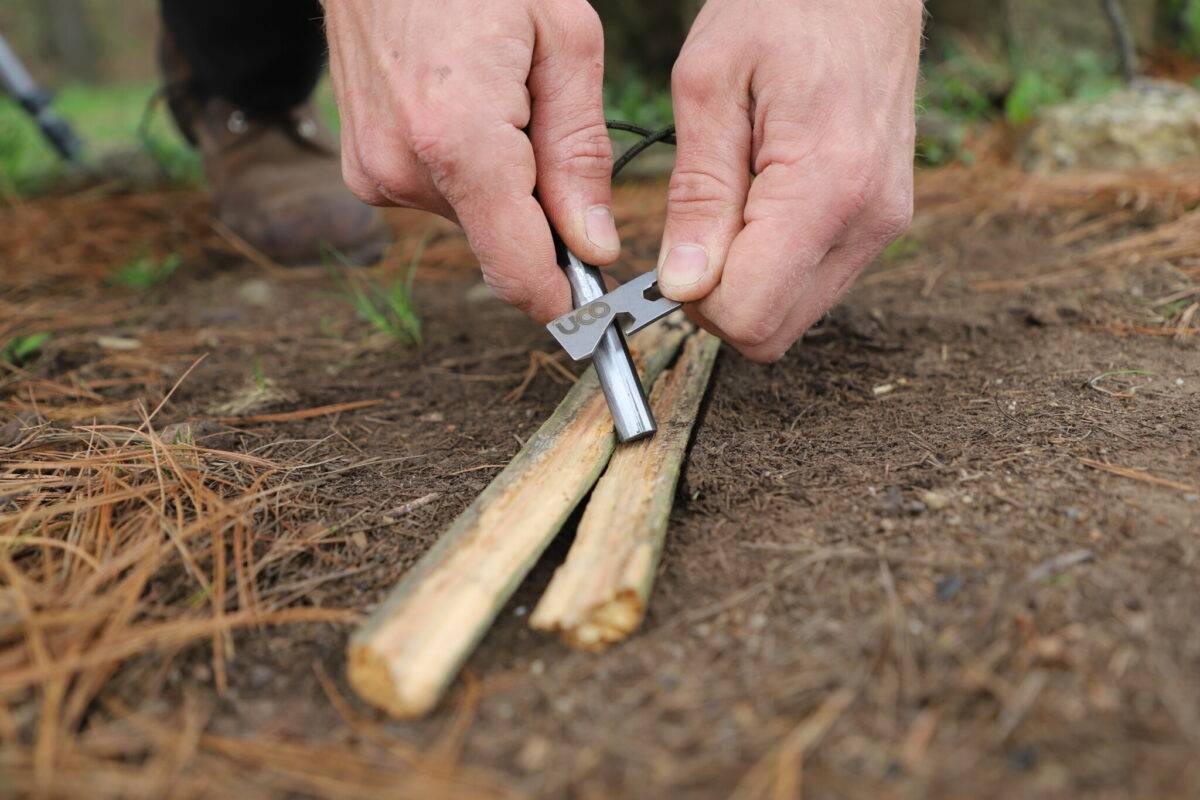
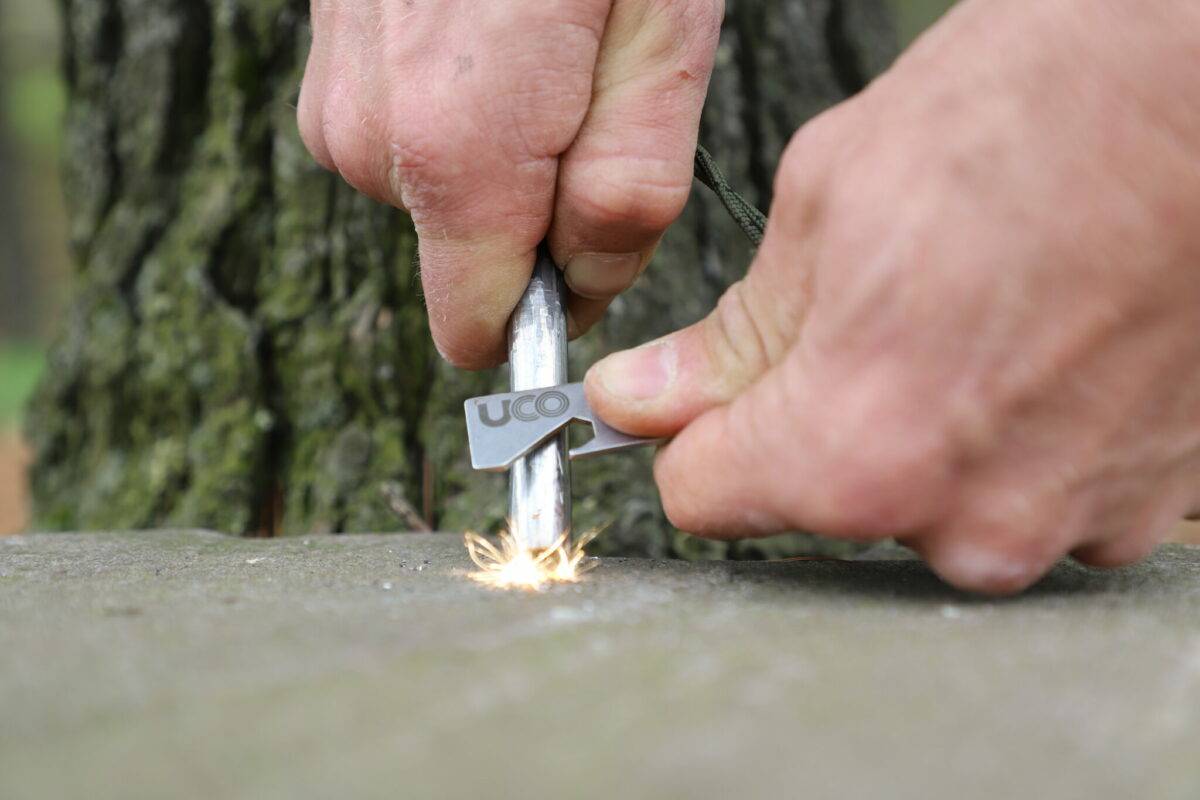
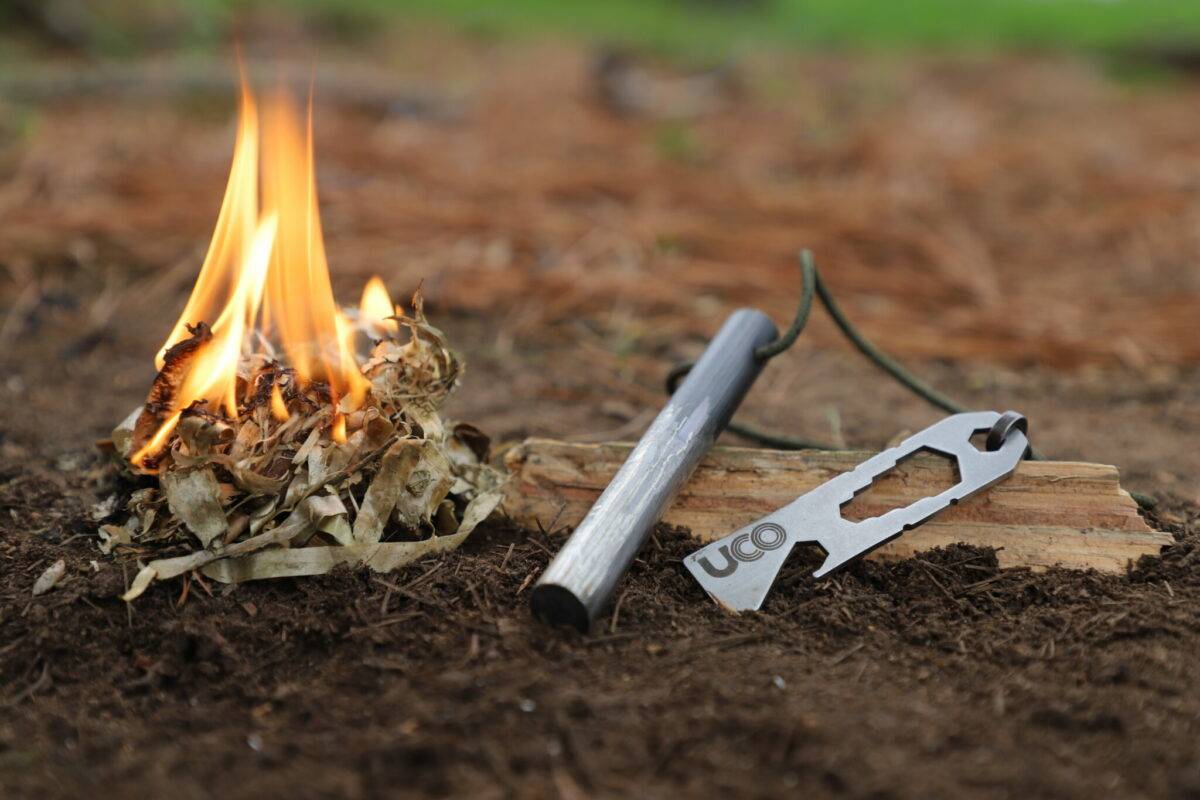
One of the easiest and most reliable tools you can have in your pack to create fire is a ferrocerium rod. Also known as a “fire starter,” ferrocerium rods are made of iron and cerium, and when scraped, they produce sparks at temperatures as high as 5000°F (2760°C). Basically, it is an easy way to start a fire under even the most challenging conditions.
These rods are typically about 3–5 inches long and 1/4 inch thick. They’re lightweight, non-toxic, and waterproof. And unlike matches or lighters, they don’t require fuel—just some elbow grease!
So how do you use one?
It is pretty easy: Prepare your tinder as described above and strike the rod along its length with a sharp-edged object—a knife works great! Keep striking until you generate enough sparks to ignite the tinder.
Photo Credit: UCO Gear
Advertisement
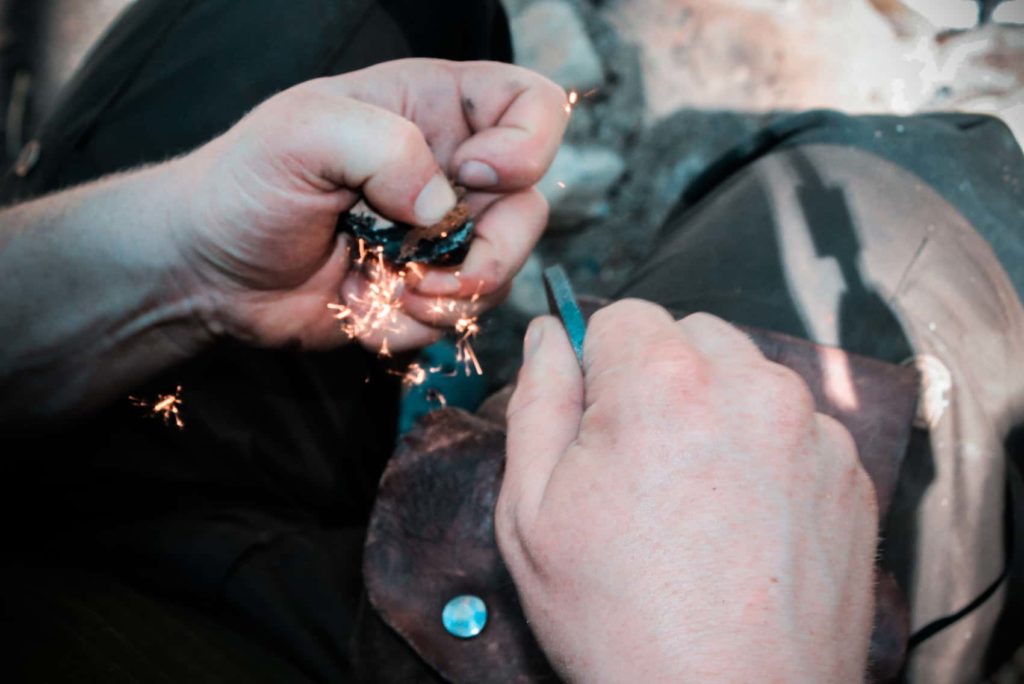
Flint and steel fire making is a method of creating a spark by striking a metal striker with a high carbon content against a piece of flint or any other extremely hard rock, for example – chert, quartz, agate, jasper or chalcedony can be used. This spark then falls into dry tinder, then oxygen is gently introduced to ignite it into flame.
How does it work?
The Striker is forcefully used to strike (hence the name) a sharp edge of the flint. This force shaves off small pieces of metal from the striker which oxidise in the air. These oxidised sparks fall onto the tinder and begin to smoulder. With proper care, this can be turned into an ember, and then into a flame.
To start your fire, hold the tinder in one hand, and strike the steel striker against the flint with your other hand. The striking motion should be a downward stroke. It may take a few tries before sparks catch on the tinder, so don’t get discouraged if it doesn’t work right away!
Once sparks catch on your tinder, use your fingers or gently blow into the spark to spread it across the tinder until it ignites.
Photo Credit: Twin Eagles
Advertisement
Obviously, the easiest way to start a fire is by using matches or a lighter. It’s always good to take the time to practice using either your flint and steel or your ferrocerium rod to start fires to develop this skill. But it does not hurt to carry a lighter or matches with you as a backup if you so wish.
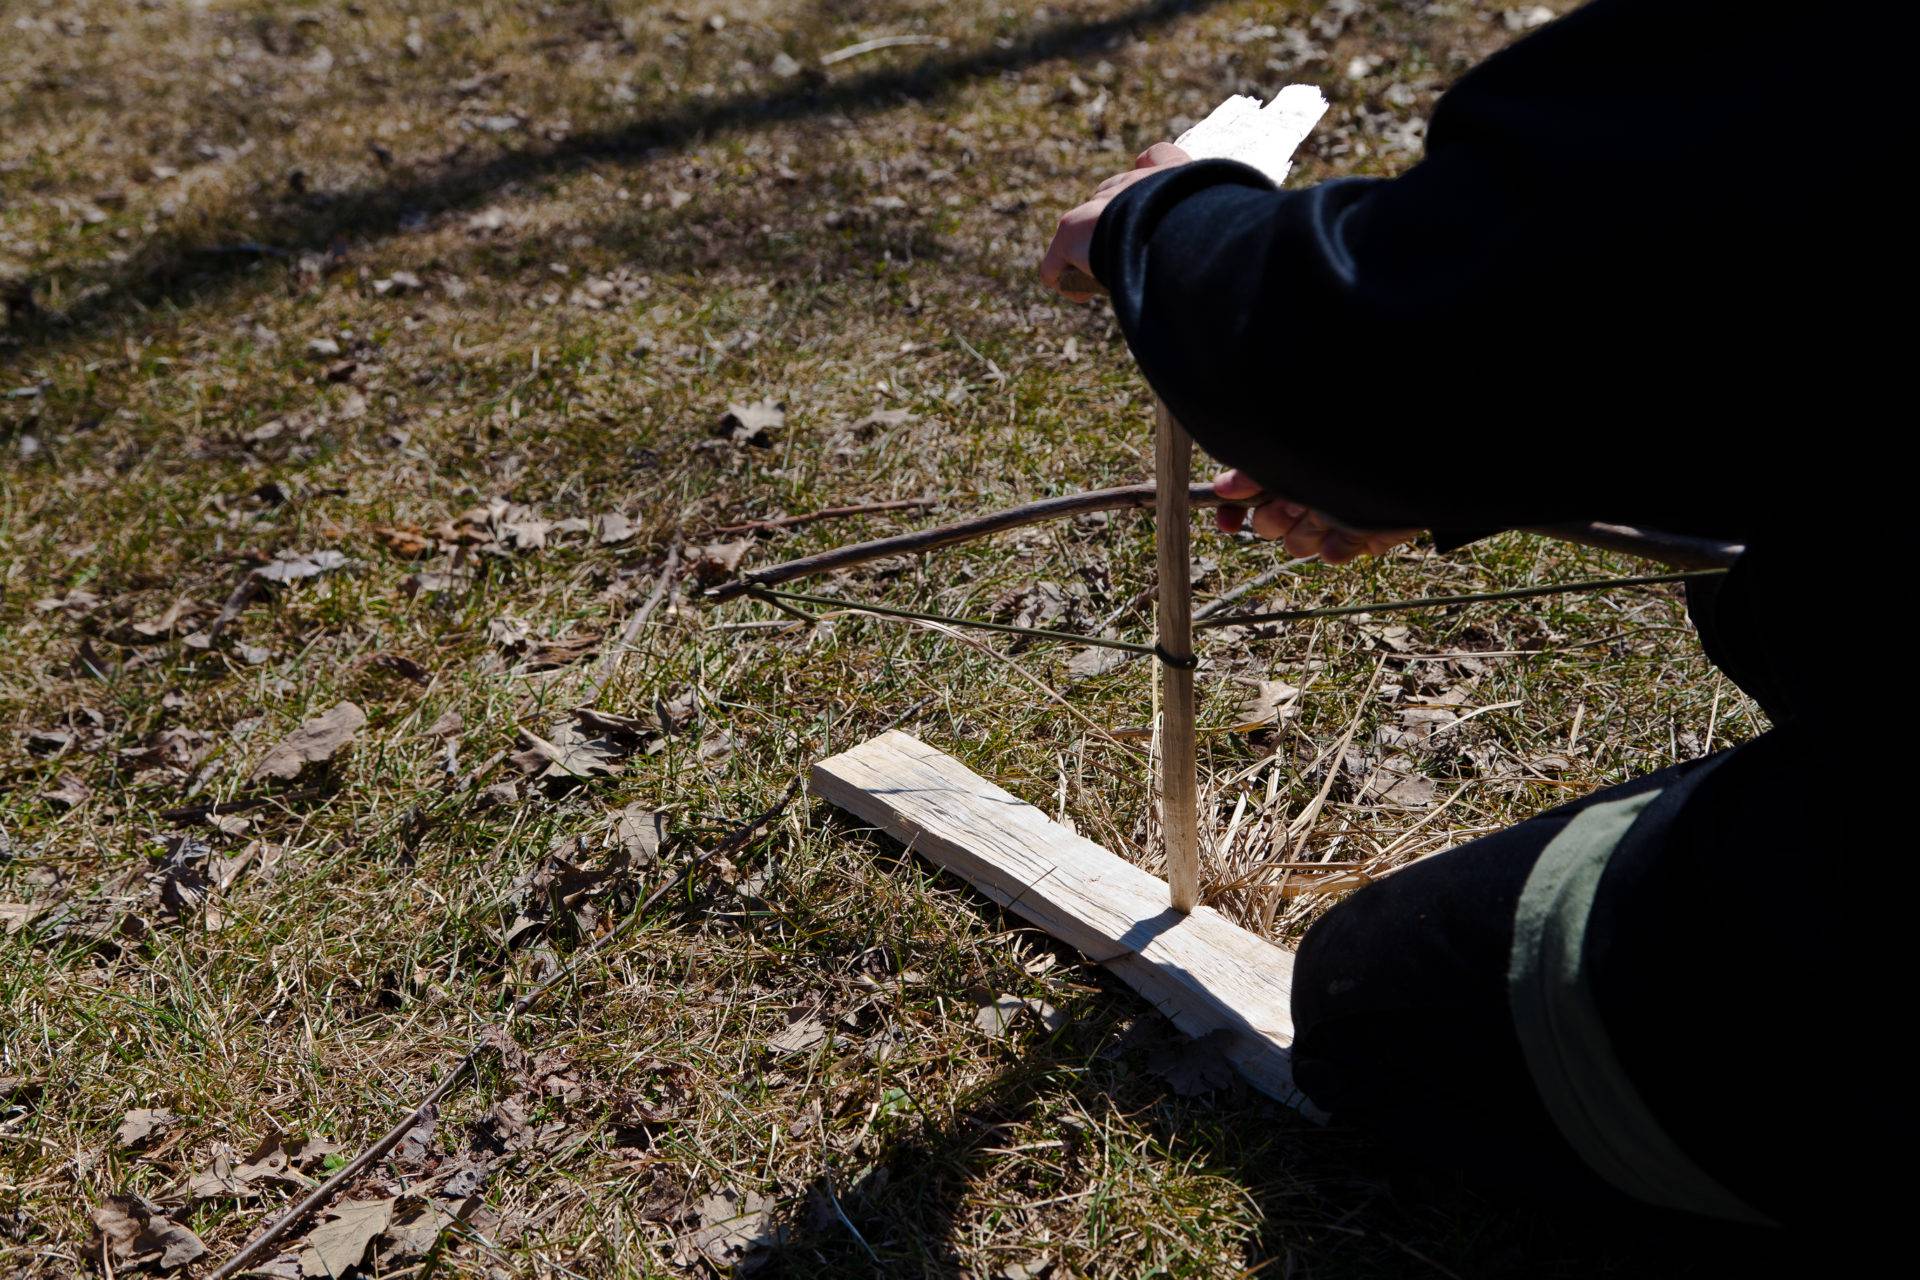
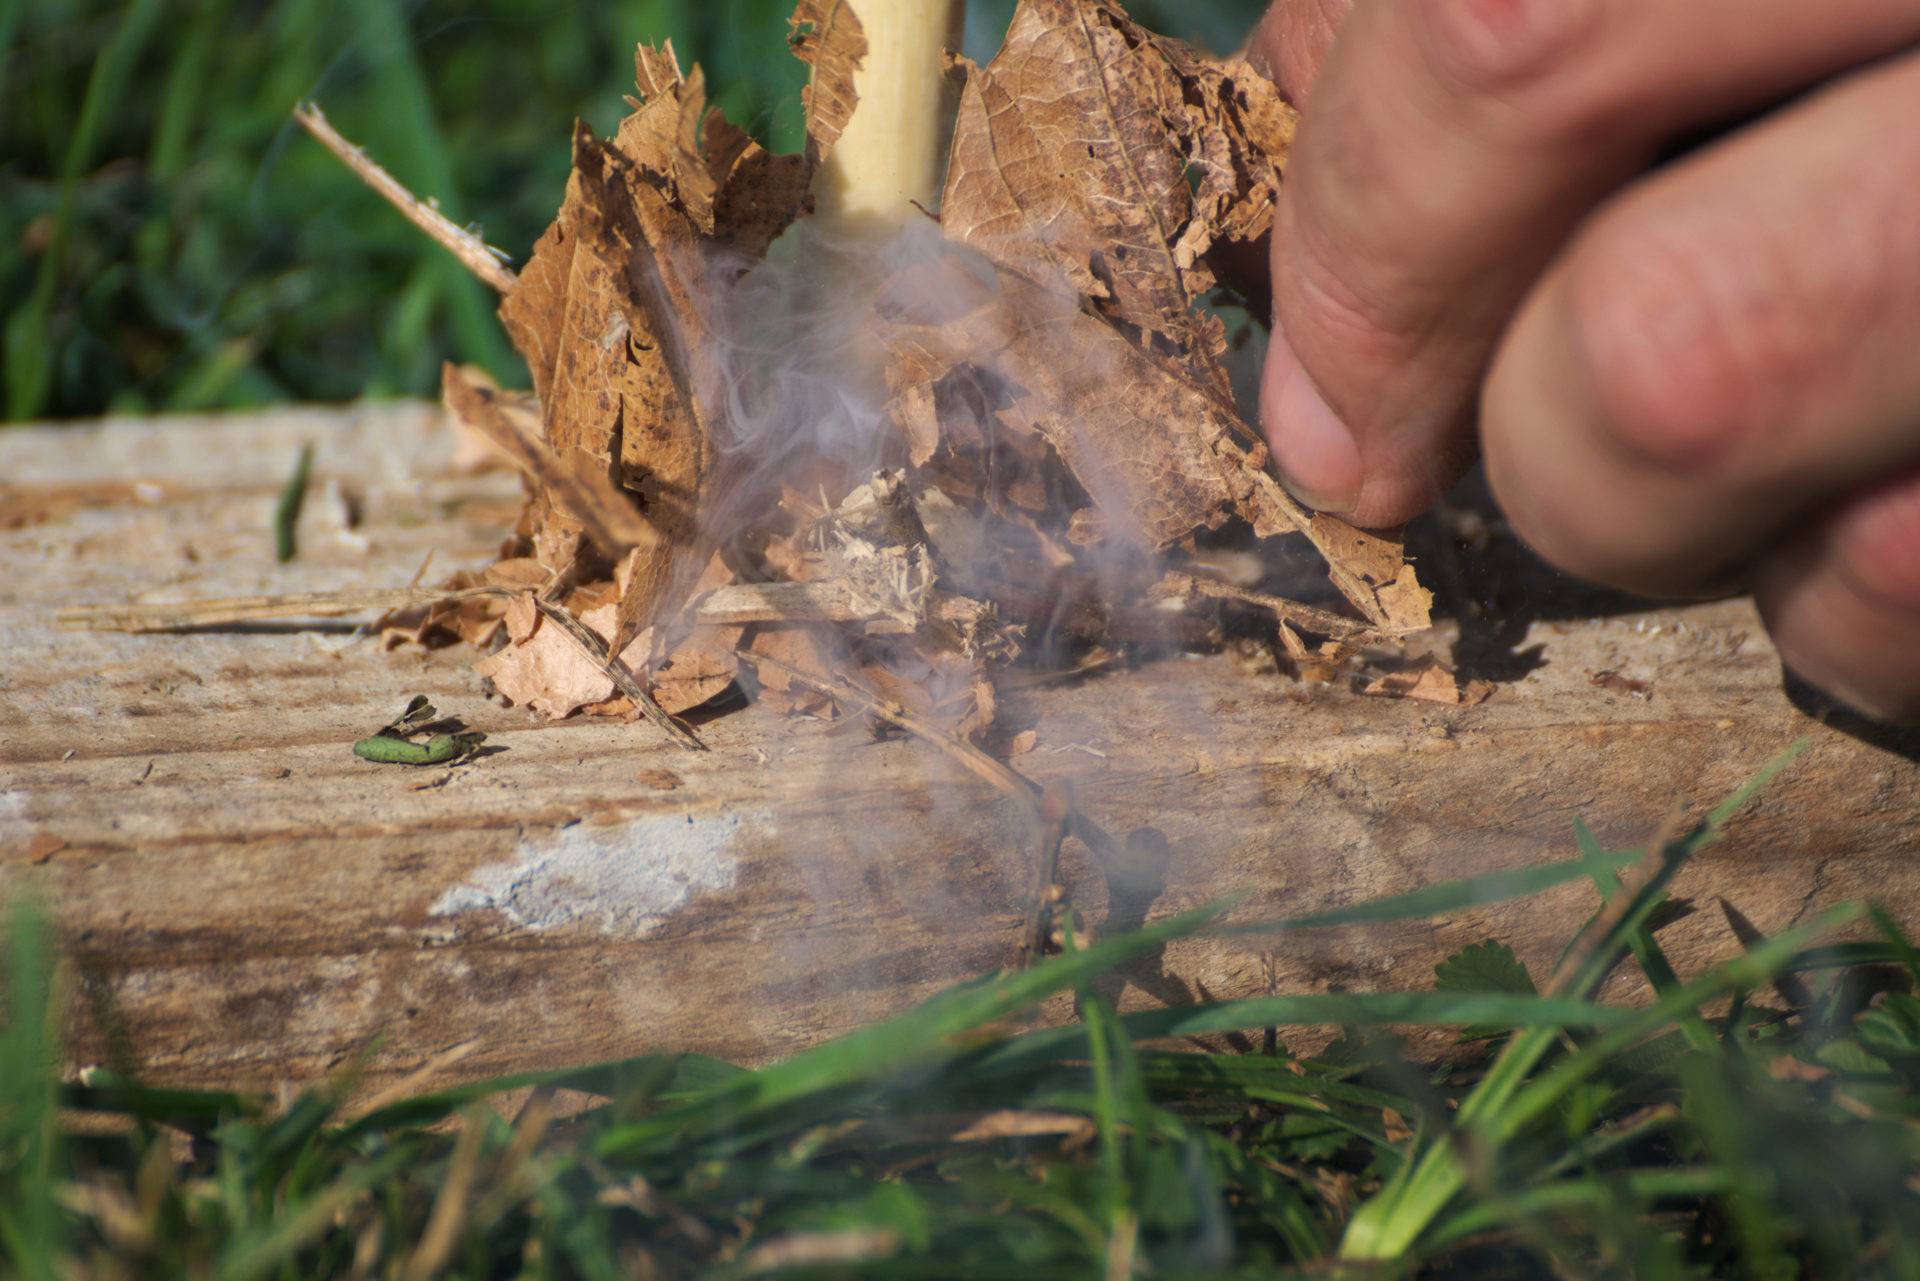
Friction fire is the art of making a flame using just your hands, wood, and gravity. The two most common methods are the bow drill and the hand drill. Both involve using a piece of wood and a spindle, which is like a stick that is longer than it is wide.
If you’re using a bow drill, you loop one end of a strap (which can be anything from shoelaces to a leather belt) around the spindle and pull it tight. Then you put the wide end of the spindle in an indentation in another piece of wood and place your non-looped hand on top of it, holding it down. Finally, you spin the spindle back and forth between your looped hand and your non-looped hand with the bow that you’ve made. This creates friction that—if done correctly—results in smoke or even sparks!
The other method is called the hand drill. It’s basically the same process except that instead of spinning with a bow, you have to spin with your hands. You lay down on your side and place one knee over the spindle for stability while you use both hands to twist it back and forth as quickly as possible.
This is an extremely difficult skill to master, and can takes years of practice to master.
Photo Credit: BC Outdoors Magazine
Advertisement
Advertisement
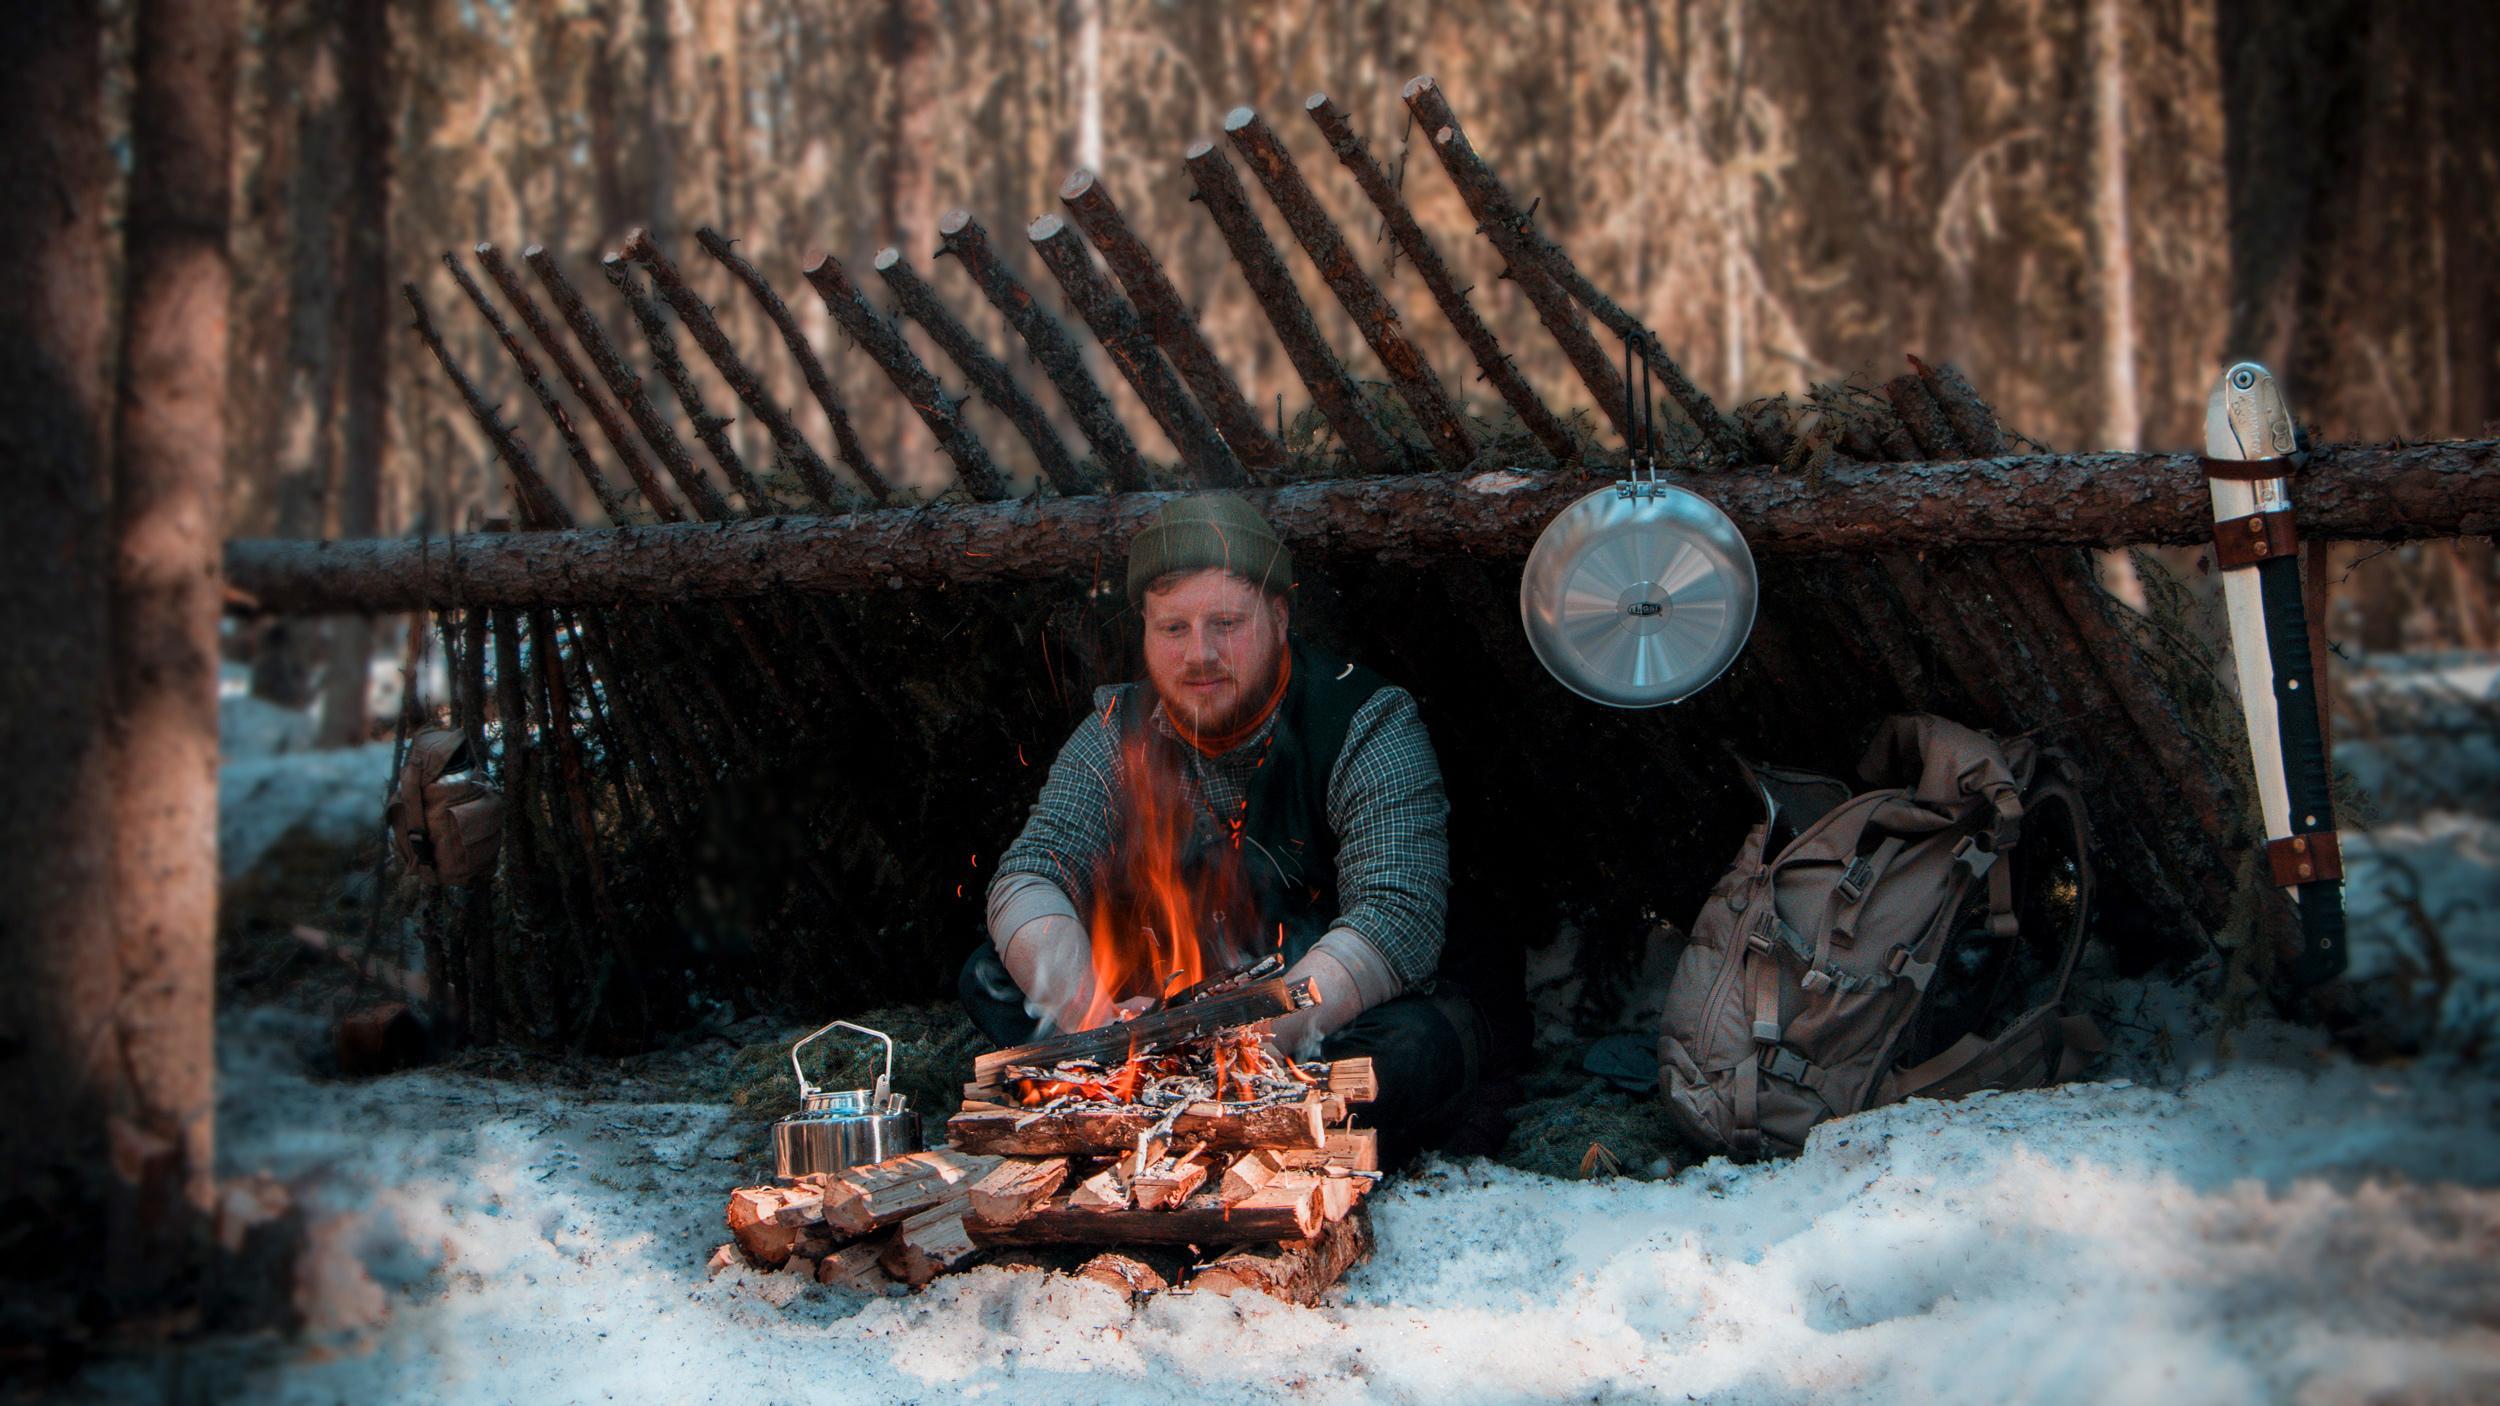
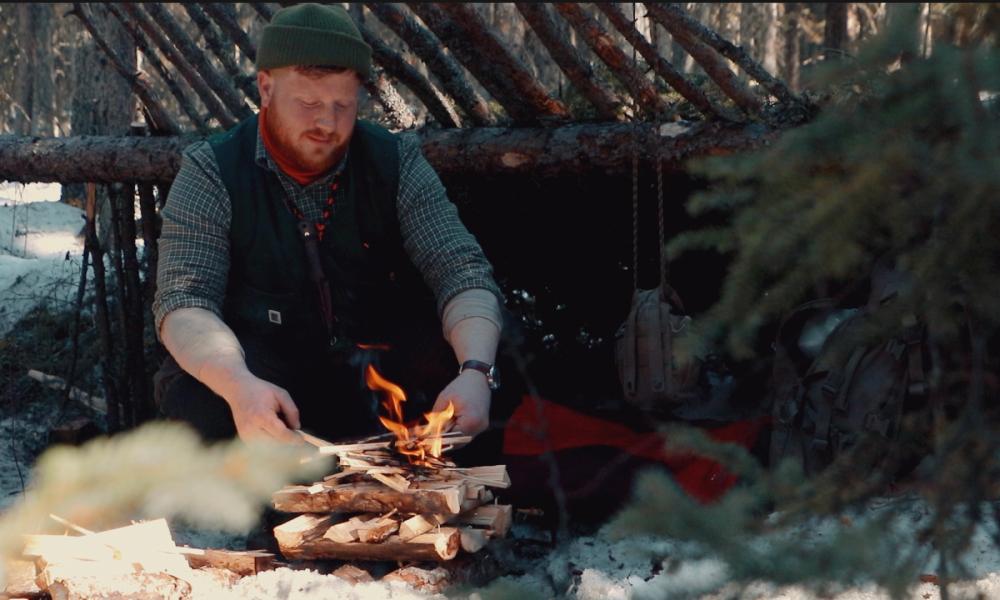
This is the part where most beginners fail. Creating a flame is reasonably easy, but establishing a fire is the hard part.
Collecting dry firewood to fuel your bushcraft fire is absolutely essential unless you want to be fighting, babysitting and getting smoked out for hours. The best way to find dry firewood is by harvesting dead-standing timber. The best kind of dead standing timber is dead (obviously)and standing as close to upright as possible. This is because if the timber is standing perfectly upright it will have had less exposure to rain and moisture, increasing the probability that it is dry and will burn well It is also important to note that whilst you want your timber to be dead, you don’t want it to be rotten or “punky” as rotten wood absorbs water.
Start by using your axe to cut down your dead-standing tree. The size and duration you want your fire to burn should dictate how thick the diameter of the tree should be. For a fire lasting 2 or 3 hours, aim for something 3 to 4 inches in diameter. If you’re spending a night in the woods and have to burn a fire overnight, aim for 5 to 6 in.
Once the tree is felled, drag it back to the camp and begin processing it. Start by using your bushcraft saw, if you have one, to cut the timber into suitable lengths based on the size and duration you want the fire to burn.
The rule of thumb for fuel for a fire is you need twice as much as you think. We also want to vary the sizes of fuel, from pencil lead thickness to pencil thickness, to finger thickness, to wrist thickness, and then larger. Split firewood burns better than whole logs, so for larger pieces consider using your axe to split them in half.
Try to have all of your fuel laid out neatly next to where you are going to start your fire so it is easily reached and can be added to the fire as needed.
Advertisement
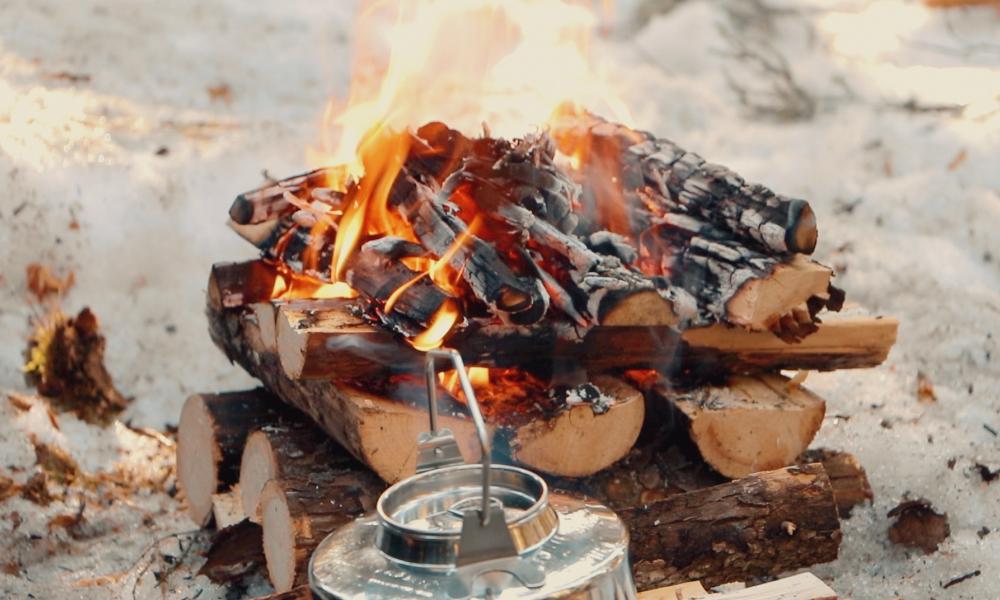
There are many different fire styles, the most common probably being the teepee fire but in my opinion, the ultimate fire style that is great in every single situation is the upside-down fire.
The beauty of this fire is that all of the work is in the setup, and once lit it can be left unattended for a long time depending on the size and height.
The premise is simple, place your largest logs on the ground alongside each other. Gradually get smaller and smaller as you stack the logs on top of each other with each row being perpendicular to the last row. The final top row should be very fine(around index finger size). Once ignited, the embers will drop through the layers igniting the logs below over several hours.
The finished product should resemble an Egyptian pyramid.
This fire is extremely effective in deep snow as the fire will burn for several hours before it even starts to melt the snow on the bottom layer. Because so much air can get to the flames, it also burns without much smoke, which I know everyone will appreciate.
You can make an upside-down fire as large or small as you need to and, honestly, it’s the only fire I make these days, as I don’t need to baby it once it is lit. I light it and then I can go about getting my kit organised or food prepared for the evening, and the fire gradually gets hotter and hotter without me needing to do anything at all.
Advertisement
This article barely scratches the surface of fire making but should give you a good overview of what you can expect on your next bushcraft trip. With fire making it is really a case of refining your skills, trial and error, and persistence. Once you get into the groove, fire-making will become extremely relaxing and simple for you, and always an enjoyable experience.
Collecting tinder on my walks in the woods when I see it and then building a toasty fire for the evening is one of my favourite things to do and I am sure it will become the same for you too.

Never Miss another Post and stay up to date on Walk Wild adventures.